DIY Guide to Installing Custom-Size Mirrors
Mirrors are a fantastic way to enhance the look and feel of any room, creating a sense of space and adding a touch of elegance. Installing custom-size mirrors may seem scary and challenging, but with the right tools and a little know-how, you can achieve a professional finish. Follow this step-by-step guide to install your custom mirrors with confidence.
Step 1: Gather Your Tools and Materials
Before you start, make sure you have all the necessary tools and materials:
- Custom-size mirror
- Mirror adhesive
- Level
- Measuring tape
- Pencil
- Painter’s tape
- Caulk gun
- Mirror clips or brackets
- Screwdriver and screws
- Safety gear (gloves and safety glasses)
Step 2: Measure and Mark
Measure the wall space where you intend to install the mirror. Use a level and pencil to mark the exact position of the mirror on the wall. Make sure your measurements are precise to ensure a straight and level installation.
Step 3: Prepare the Wall
Clean the wall surface thoroughly to remove any dust or debris. This will help the adhesive bond more effectively. If you’re using mirror clips or brackets, mark the positions for the screws and drill pilot holes.

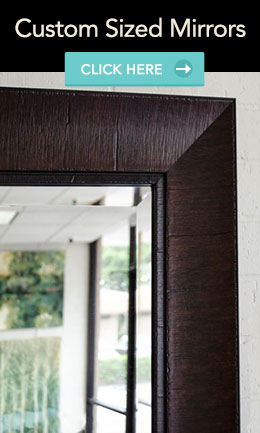
MAL-0293 Brown Framed Mirror For Bathroom
Step 4: Apply the Adhesive
Apply mirror adhesive to the back of the mirror. Use a caulk gun to create evenly spaced lines or dots, avoiding the edges. This will help prevent adhesive from squeezing out when the mirror is pressed against the wall.
Step 5: Position the Mirror
With the help of a friend, carefully position the mirror against the wall, aligning it with your pencil marks. Press firmly to ensure good contact between the adhesive and the wall. Use painter’s tape to hold the mirror in place while the adhesive sets.
Step 6: Secure with Clips or Brackets
If you’re using mirror clips or brackets, secure them over the edges of the mirror. Use a level to ensure the mirror remains straight as you tighten the screws. These additional supports will help hold the mirror securely in place.
Step 7: Allow Adhesive to Cure
Follow the adhesive manufacturer’s instructions for curing time. This usually takes about 24 hours. Avoid touching or adjusting the mirror during this period to ensure a strong bond.
Step 8: Finish and Clean Up
Once the adhesive is fully cured, remove the painter’s tape and clean the mirror surface with a glass cleaner. Check that the mirror is securely attached and make any final adjustments as needed.
Installing a custom-size mirror is a manageable DIY project that can dramatically enhance your space. By following these steps, you can achieve a professional finish and enjoy the benefits of your new mirror. Take your time, measure accurately, and ensure you have the right tools for the job. With a little patience and effort, your custom mirror will look stunning and perfectly positioned.